What is a Journey?
A Journey is created when you decide to actively pursue an opportunity. It tracks everything from your initial assessment through final submission — a project workspace for each bid.Benefits
- Stay Organized: All bid-related information in one place
- Track Progress: Monitor each stage of your pipeline visually
- Collaborate: Assign team members and coordinate work
- Meet Deadlines: Never miss a due date with built-in task management
- Generate Proposals: Create tailored AI proposals directly within your journey
Creating a Journey
From an Opportunity
- Open any opportunity from Search, Leads, or Recommendations
- Click Start Journey
- A journey is created automatically with the opportunity details pre-filled

From Journey Hub Directly
- Go to Journey Hub under the Management section of the left sidebar
- Click + New Journey in the top right corner
- Fill in the title, description, due date, and initial status
Pipeline Stages
Journeys move through five stages:Assessment
Initial evaluation — deciding whether to pursue
In Progress
Actively working on the bid
Submitted
Bid has been submitted
Won
Contract awarded successfully
Lost / No-Bid
Not selected or decided not to bid
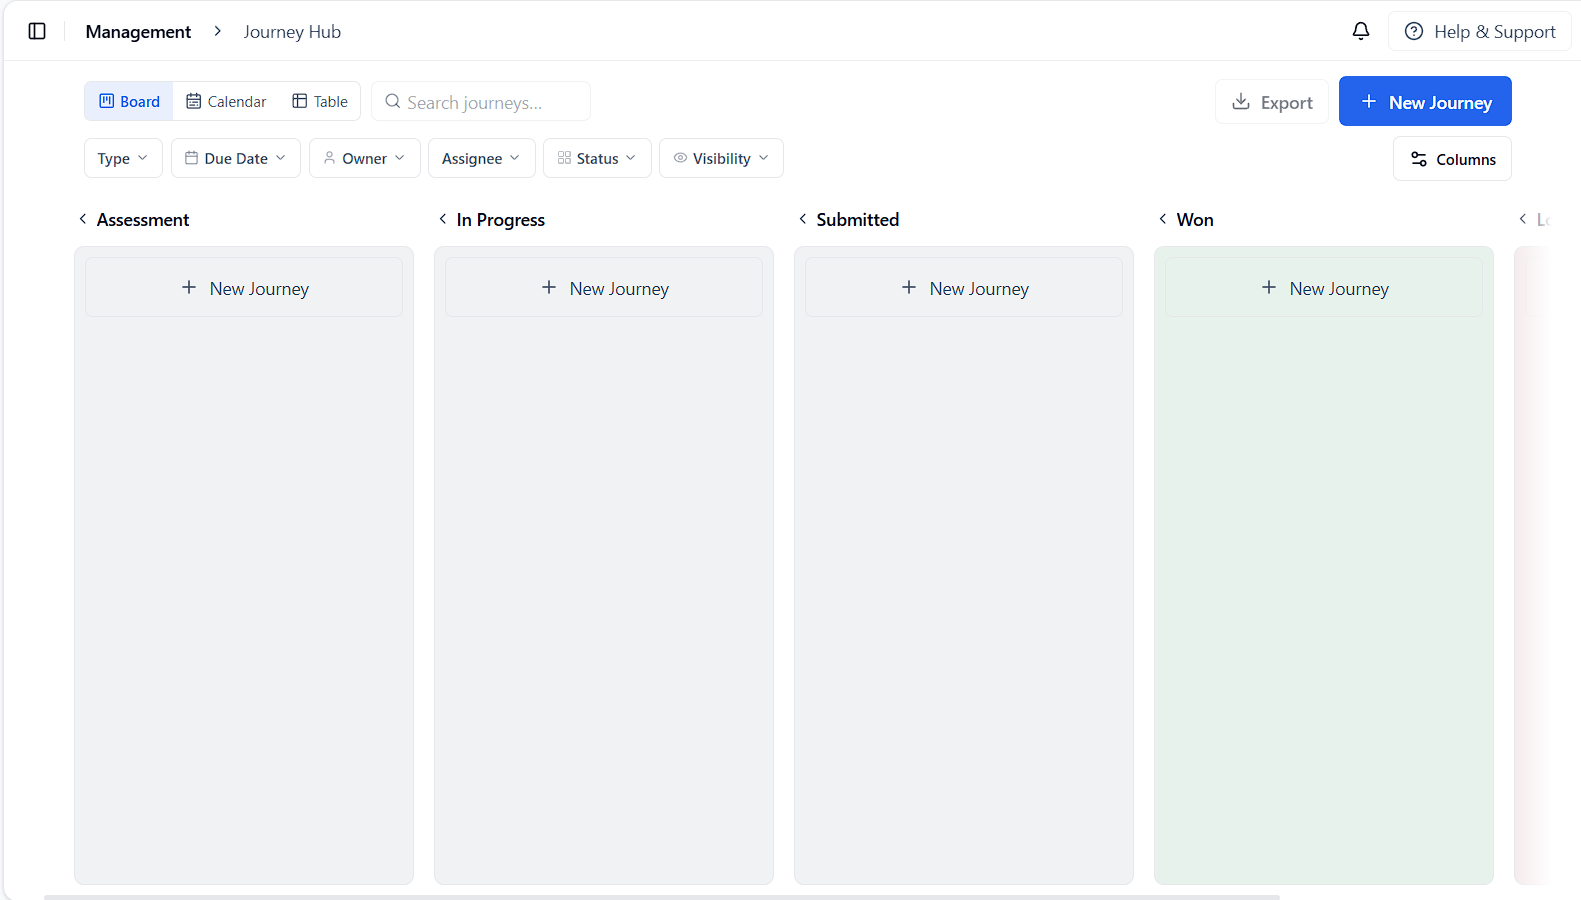
View Modes
Switch between four views using the controls at the top of Journey Hub:Kanban Board
Default view — see all journeys organized by pipeline stage. Drag and drop cards between columns to update status.
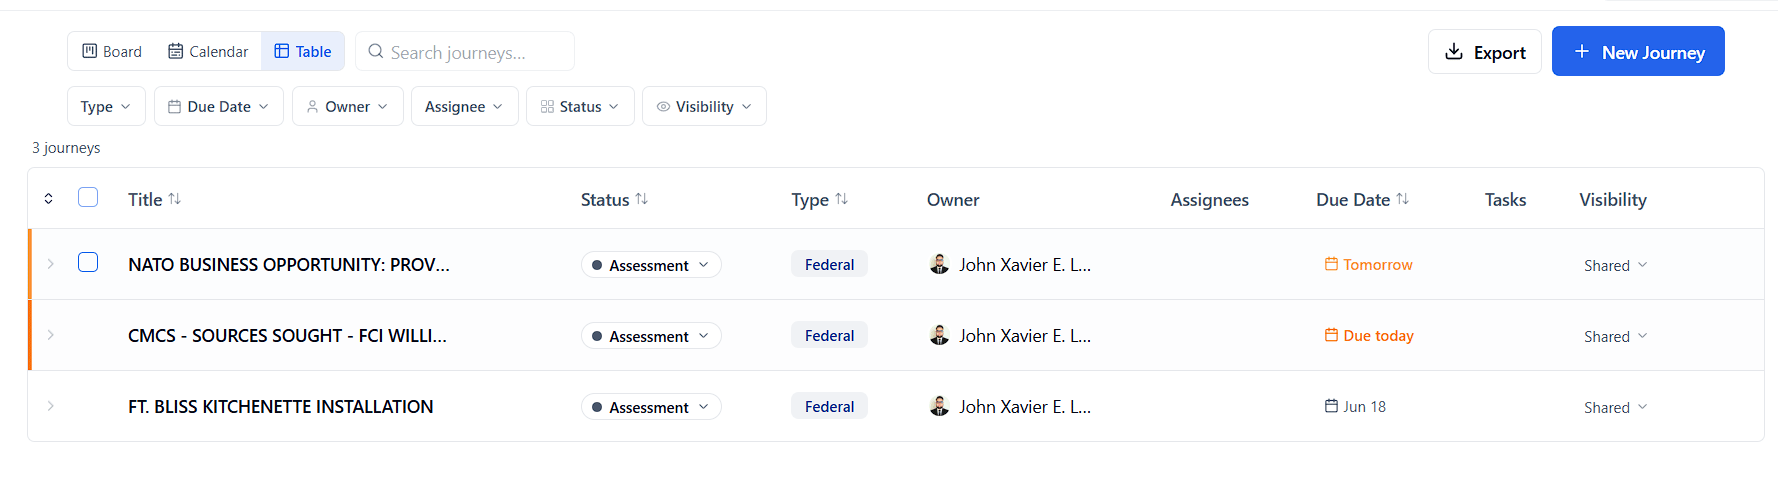
Table View
Sortable list with inline status updates and bulk actions. A red X overdue badge appears when journeys have passed their due date.
Calendar View
See journeys plotted on a calendar by due date. Useful for workload planning and deadline management.
My Tasks
Your personal task workspace — see every task assigned to you across all journeys in one place. See below for full details.
My Tasks
Getting There
- Click My Tasks in the view switcher at the top of Journey Hub (next to Board / Calendar / Table)
- Or open your Dashboard and click the My Tasks card in the bottom-right stats panel
- Or click the Activity & Deadlines card title on your Dashboard
Tasks Tab
The default tab shows all your assigned tasks, grouped by due date:
Each task row shows the task title, its parent journey name and type, a color-coded priority dot, and the due date (red if overdue, amber if due today).
Check off tasks directly — click the checkbox on any row to mark it done instantly. The task detail page will also reflect the change immediately without a refresh.
Filters and grouping:
- Quick filters — All / Overdue / Today / This week (with counts)
- Status filter — All / To Do / In Progress / Done
- Group by — Due date, Journey, Status, or Priority
- Scope toggle — Switch between My tasks (tasks assigned to you) and All tasks (every task across all your journeys, with assignee avatars shown)
Mentions Tab
Shows all @mentions directed at you across every journey. Each mention displays who mentioned you, the message, its parent journey or task, and a timestamp. Unread mentions are highlighted — clicking one marks it read and takes you directly to the relevant task.Journeys Tab
Shows every journey you own or are assigned to, with:- Journey name, type badge, and pipeline stage
- Your due date
- A progress bar showing your completed tasks vs. total tasks assigned to you in that journey
Filters
Use the filter bar to focus your view:- Type: Filter by opportunity type (Federal, Grant, SLED, etc.)
- Due Date: Show only journeys due before a specific date
- Owner: Filter by journey owner — “Me” or a specific team member
- Assignee: Filter by one or more team members assigned to the journey
- Visibility: Organization-wide vs. private journeys
- Stage: Filter by pipeline column (Assessment, In Progress, etc.)
Journey Features
Overview
From any journey’s Overview tab, click View Opportunity to return to the original listing in Search or Leads.
Win Themes
The Win Themes section defines the core narrative of your bid. Click Generate for Me to have AI suggest win themes based on the opportunity and your company profile. Win themes guide proposal generation.Tasks
Break your work into specific, trackable action items.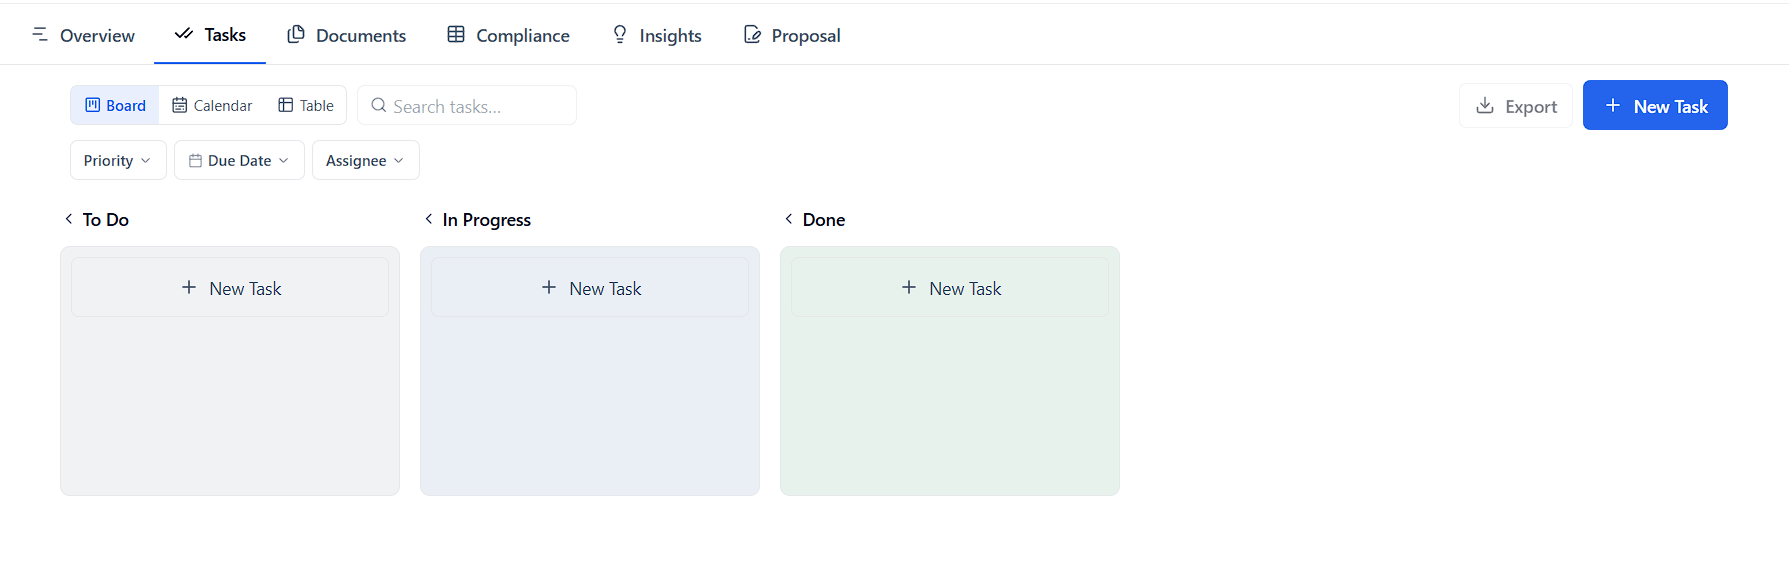
- Create tasks with deadlines and priority levels
- Assign tasks to team members
- Mark tasks complete to track progress
- Add notes and context to each task
- Board — Kanban columns: To Do, In Progress, Done
- Calendar — tasks plotted by due date
- Table — sortable list with bulk actions
Want to see all your tasks across every journey at once? Use My Tasks in the Journey Hub view switcher.
- Review RFP requirements
- Gather company documentation
- Contact references
- Prepare technical approach
- Review pricing strategy
- Submit bid package
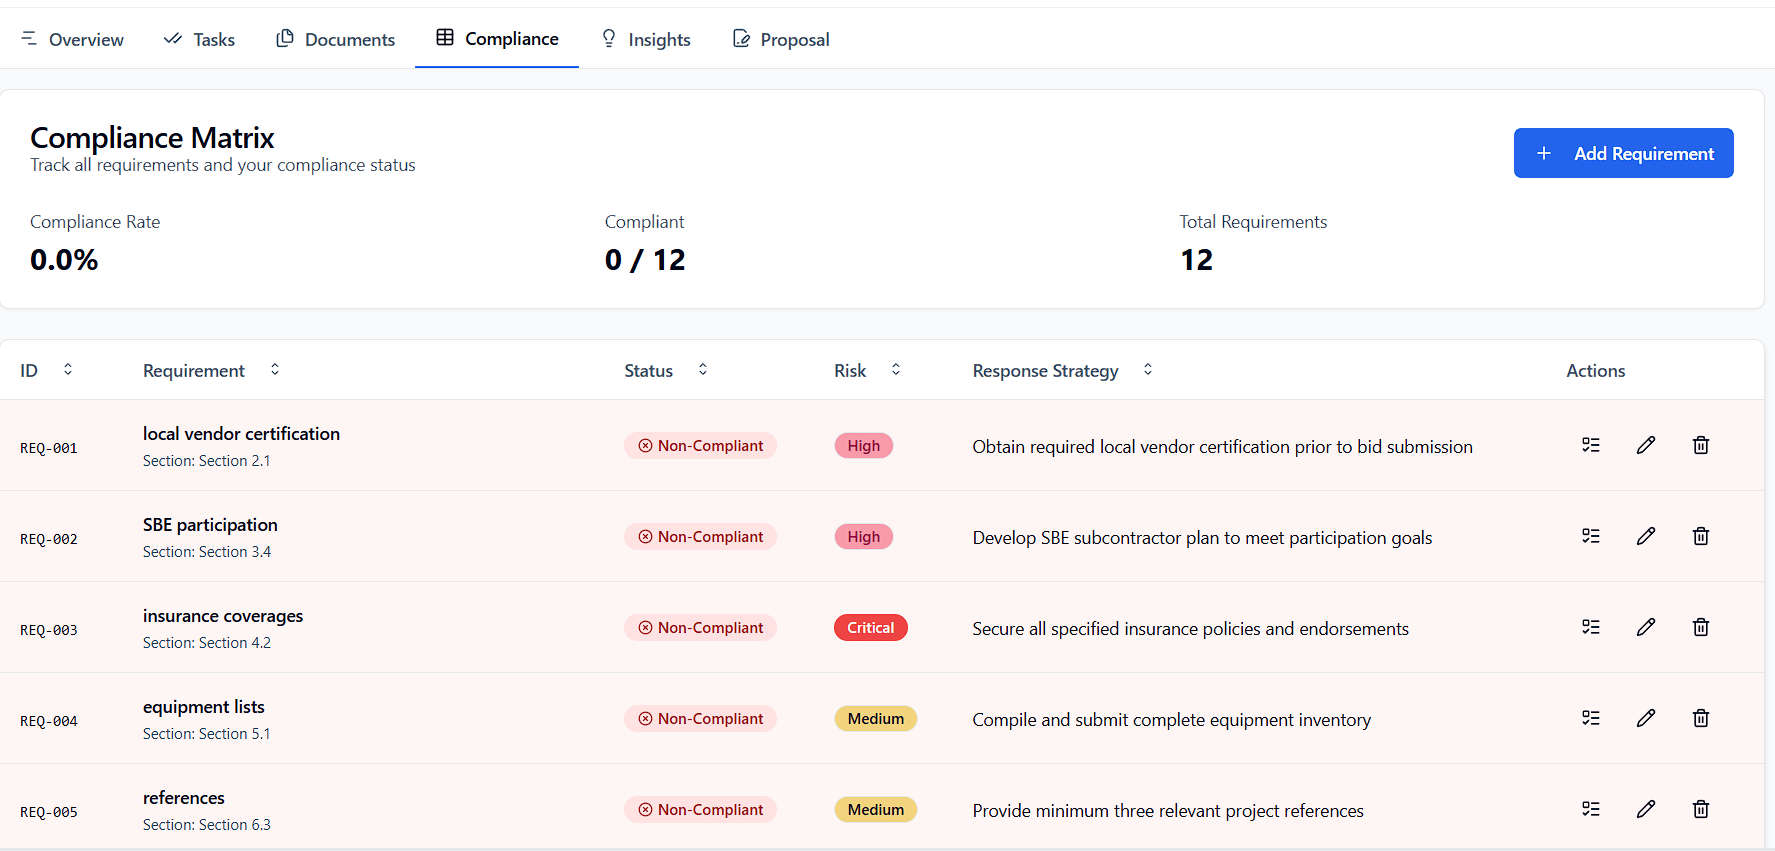
Compliance Matrix
Track RFP compliance requirements directly within the journey.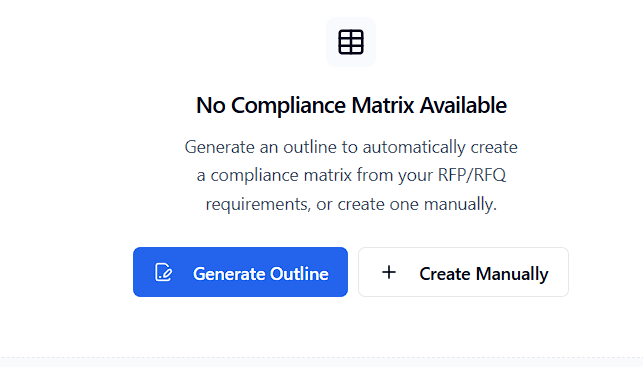
- Generate from outline — click Generate Outline to extract requirements from your RFP/RFQ
- Create manually — click Create Manually to build the matrix row by row
- Use the matrix to ensure every requirement is addressed before submission
Strategy Insights
Get AI-generated strategy recommendations for your journey.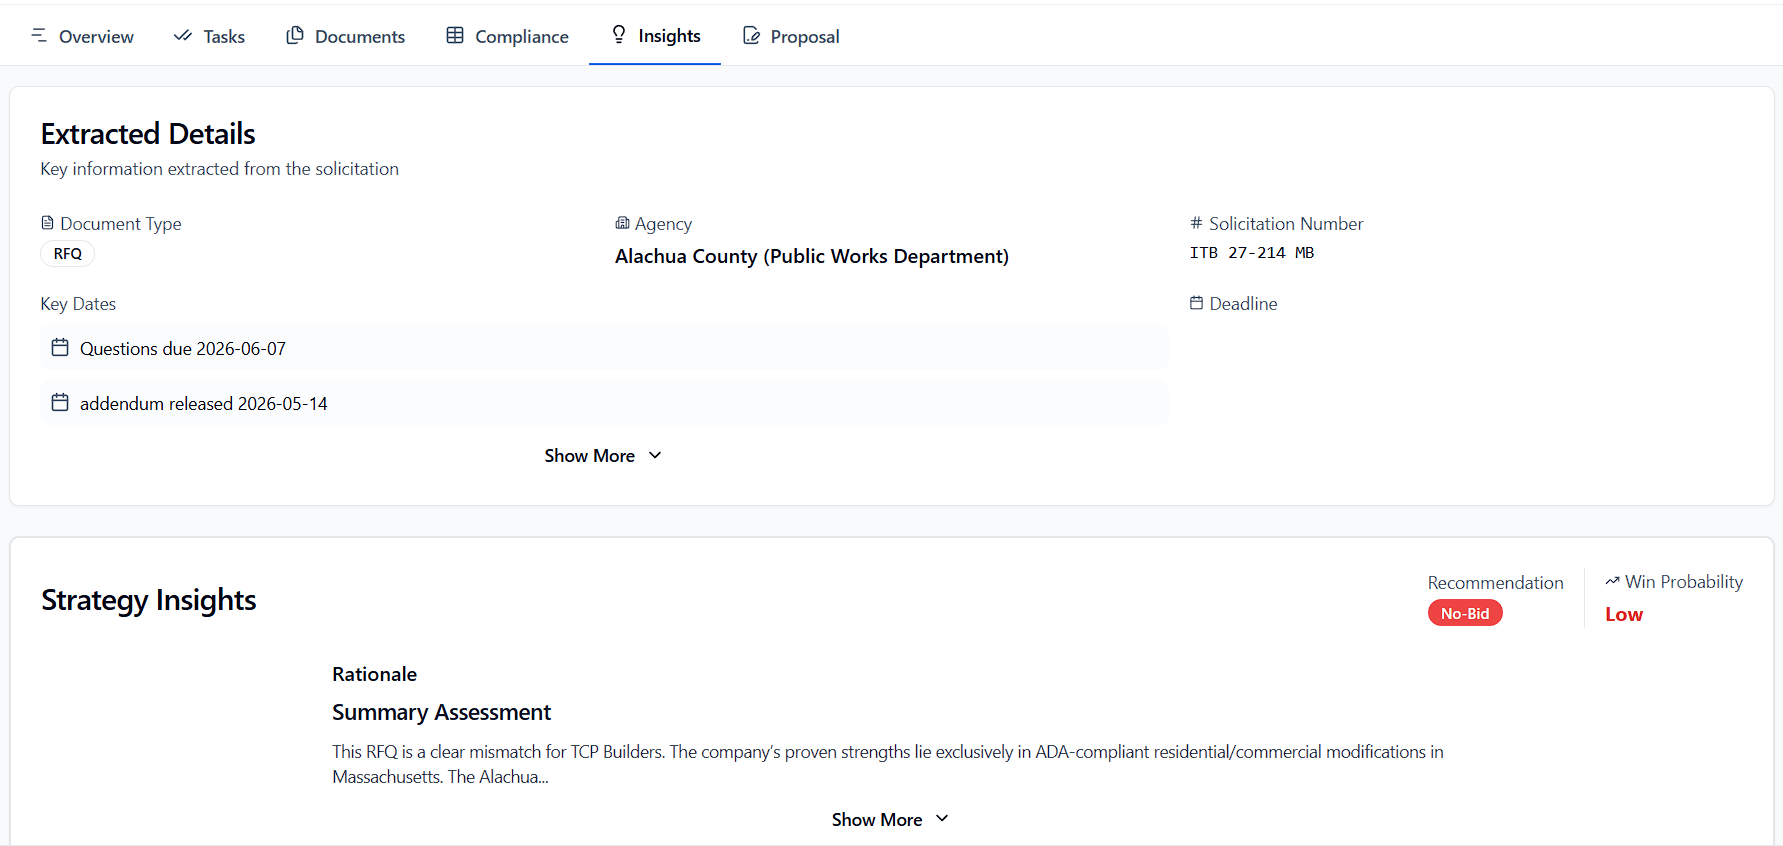
- Click Generate Outline to create insights based on your RFP and business profile
- Insights surface competitive positioning, risk factors, and recommended approach angles
- Use insights to inform Win Themes and your proposal narrative
AI Chat (Sammy)
Chat with Sammy directly within any journey to analyze the RFP, understand requirements, or get help drafting content. Learn more about Sammy →Proposal Generation
Generate AI-powered proposals directly from your journey:- Add win themes in the Overview section
- Go to the Proposal tab
- Select your relevant company documents
- Click Generate Outline, then Generate Proposal
Document Management
Store all bid-related documents within the journey:- Original RFP and attachments
- Draft proposals and versions
- Supporting documents (certs, past performance, etc.)
Supported Opportunity Types
Journey Hub works with all opportunity types:- Federal Contracts
- State, Local & Education (SLED)
- Forecasts
- Subcontracting
- Grants
- DIBBS
- Upload (manually created opportunities)
Team Collaboration
Team collaboration in Journey Hub is available on multi-seat plans. Set up your organization and invite teammates from the Settings page first.
Roles
Inviting Team Members
Admins and Owners can invite teammates from Settings → Organization:- Click Invite Member
- Enter their email address
- Select their role (Member or Admin)
- Click Send Invite — they’ll receive an email invitation
The invite button only appears when you have available seats. If you’re out of seats, upgrade your plan or remove inactive members first.
Managing Members
From Settings → Organization you can:- Change a member’s role — Use the role dropdown next to any member
- Remove a member — Click Remove to revoke their access
- See pending invites — Invited members show a Pending badge until they accept
- Update org name — Click the edit icon next to your organization name
- Upload org logo — Click the upload button on the organization avatar
Assigning Journeys
Each journey has an Owner (who created or is responsible for it) and can have one or more Assignees (team members actively working on it). Use the Owner and Assignee filters in Journey Hub to see:- Only journeys assigned to you
- Journeys owned by a specific teammate
- The full team’s pipeline across all members
Assigning Tasks
Within a journey, individual tasks can be assigned to specific team members — reviewing the RFP, gathering past performance, pricing, and more.Visibility
Journeys can be set as:- Organization-wide — visible to all members of your organization
- Private — visible only to you and directly assigned members
Best Practices
- Use clear titles — Make each journey easy to identify at a glance
- Set due dates early — Allow time for review and revision, not just submission
- Break work into tasks — Specific tasks are easier to complete than vague to-dos
- Keep statuses current — Move cards through stages as work progresses
- Assign ownership — Every journey should have a clear owner
- Use visibility settings — Keep sensitive journeys private; share the rest with your team
- Check My Tasks daily — Start your day in My Tasks to see what’s overdue, due today, and coming up this week across all your active bids